Friday, August 12, 2011

Soya Ramly Burger with Chili Mayo and Yogurt Green Slaw - An Ode to the famous Ramly Burger in Kuala Lumpur, Malaysia.


I tried to argue with myself a lot and tried to think down memory lane to think of a better burger that I have had, but I would have to go so far as to say that this is the best burger I have ever had. I know it is a huge thing to say, but this dish is comforting, packed with flavor, and light on the calories too. What can I say, it is a complete win-win situation :) I seriously recommend you guys to try this out! The best burger that I had before this one was the Ramly Burger on the streets of Kuala Lumpur, Malaysia, 2 months ago. Ramly is the name of the company that manufactures these ready to eat frozen chicken and beef patties which you have to just grill or pan fry. You can find these stalls just like the Vada Pav stalls here in Mumbai and every local knows about them. That is just plain out greasy awesomeness. So I had to find a way to have the best of both worlds and I think I achieved it pretty well!!!

Soya Ramly Burger with Chili Mayo and Yogurt Green Slaw
Serves 4, but with the kind of awesomeness going around I would say that it serves 2 people coz they will go for seconds.

The recipe for these Burgers is basically just a bunch of my recipes put together, plus the buns and the Yogurt Green Slaw.

You will need :

1 recipe Faux Minced Meat Burger patties
1 recipe Homemade Mayonnaise plus I added some Chili Flakes to it.You could just use store bought Mayo and add chili flakes to it.
3 eggs for the omelet, and a dash of milk.
2 Cucumbers/Zucchini, thinly sliced into ribbons.
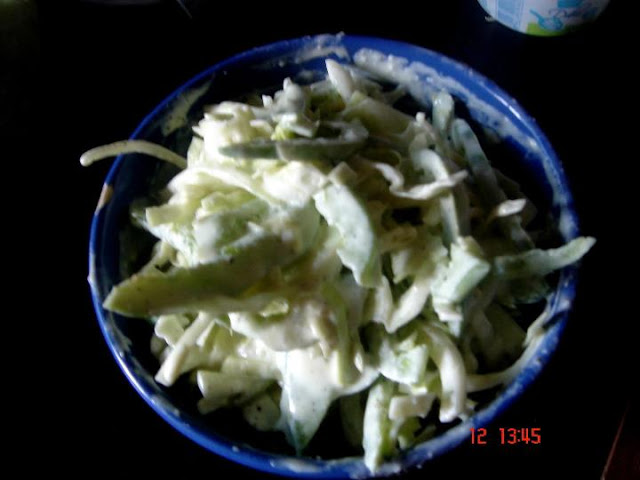
Yogurt Green Slaw:
For this you need:
1 cup shredded Cabbage
1 cup shredded Green pepper/Capsicum
1/2 cup Yogurt
2 tablespoons Homemade Mayonnaise
1 tablespoon Mustard
lots of pepper
Salt to taste
1 teaspoon Sugar
1 teaspoon Vinegar/1 tablespoon Lemon Juice

Method:

Mix in the Cabbage and Capsicum in a large bowl.

Mix all other ingredients to form the dressing.


Then pour over the shredded veggies and mix well. I prefer mixing with hands, and I prefer a lot of pepper for the extra kick. Refrigerate for at least an hour.


Once you have everything ready, assemble the Burger.

Beat the 3 eggs with very little salt and a dash of cream or milk. Heat a flat pan on medium and then pour a little, about a quarter of the egg mixture on the pan and then swirl it around so that you get a nice thin egg pancake. Turn the heat to medium low and let the egg cook.


Now add the Soya Patty in the center, and fold the egg around it like an envelope. Sorry I could not take a picture, there was just too much going on and I was working alone :) Toast your buns at the side while this process gets completed. Now place the parcel on the lower side of the bun and top it with some Mayo and then the Cucumber slices, now add some Mustard and/or Ketchup if desired, and some Green Slaw. Top with the other half of the bun and bite into a piece of heaven. I promise you that you will not regret making this.


Of course, one can experiment by using regular cole slaw, adding other veggies like bean sprouts, onions, Lettuce, whatever you like! But do let me know how it turns out :)

Wednesday, August 3, 2011

The Kadhi Connection! (Kadhi Pakoda)


For all of you who do not know what this is, it is an Indian dish originating mainly from the Northern part of the country and is a gram flour and buttermilk based curry in which yummy fritters are added for a wonderful contrast in texture and flavor. There are many cheap and tasteless variations available in the restaurants these days but nothing beats a good bowl of homemade Kadhi. This recipe is so amazing, that I actually ended up having 2 bowls of the Kadhi even before it was completely ready. This is THAT GOOD. So for all the Kadhi Pakoda Lovers, and the ones who have not tried it (YOU MUST TRY IT!), here's the best ever Punjabi Kadhi Pakoda, just like grandma makes it!!! :)

Punjabi Kadhi Pakoda
Serves 4-5 + leftovers
Recipe from A Mad Tea Party 
I really would recommend you guys to check her awesome description of the recipe :)

Ingredients:

For the Pakodas:

3/4 Cup sour yoghurt)
1 Cup besan (chickpea/gram flour)
1 medium onion, chopped
1 small potato, peeled and chopped into small dice
1 teaspoon red chilli powder
1 teaspoon turmeric
1/4 teaspoon baking soda
Oil for frying

For the Kadhi:

3 Cups sour buttermilk
2 Cups water
1 Cup besan/Gram Flour
1.5  teaspoons turmeric
Cayenne, to taste
1 tablespoon Oil
1 teaspoon cumin seeds
3/4 teaspoon mustard seeds
1/2 teaspoon kalonji (nigella) seeds
1/2 teaspoon methi(fenugreek) seeds
1/4 t mild hing/asafoetida
4-5 whole red chillies
salt

For the Tadka/Tempering:

1 Tablespoon Ghee/Clarified Butter
1/2 teaspoon red chilli powder
1 teaspoon Cumin Seeds.

Method:


I am just going to paste the method as explained by A Mad Tea Party on her blog 'coz honestly, I could not have done any better. So here it goes! My notes are in italics through the recipe.


To make the pakoras, gradually add buttermilk (or yoghurt, plus water as needed) to the besan to make a thick smooth batter. Add turmeric, red chilli powder, chopped onion and potatoes (what I do with the potatoes is I chop them and then put them in a microwave vessel and drizzle with very little oil, cover and microwave it for 3-4 minutes. It works way better, let it cool) , and mix. Heat the oil in a karahi (Wok) till just below smoking. You can test by putting a drop of the batter into the hot oil – it should sizzle and rise to the top but not get browned right away. Add the baking soda, and mix well. Drop batter by spoonfuls (I use a teaspoon) in batches to make small pakoras, not more than ¾ inches across. Fry till medium brown, and drain on a paper towel.

Do not add salt to the pakora batter for two reasons. One, it supposedly keeps them from sucking up too much oil. Two, and more important, it ensures that you will have pakoras for the kadhi. Like cake, you cannot eat your pakoras and have them too :D !

Baking soda makes the pakoras light and soft. If you want a lower sodium version, and wish to avoid baking soda, beat the batter till light, and then add the chopped onions and potatoes. Fry similarly in hot oil, and soak in a bowl of water immediately. Tip the pakoras with this water into the kadhi.

Mix the other cup of besan with the remaining buttermilk (or sour yoghurt). Add water to thin. If you see any lumps, just let the mixture stand for a few minutes and then stir again; the lumps will dissolve.

Retain just 1 tablespoon of oil in the karahi. To the hot oil add the following, in order: cumin, mustard, nigella, and methi seeds, hing, and the whole red chillies. Stir and add the turmeric and red chilli powder. Give the besan-buttermilk mix a good stir and pour into the karahi. Turn the heat to medium, add salt, and stir. The kadhi will begin to thicken. Add more water if needed; the consistency should be that of very thick creamy soup.
 Bring the kadhi to a boil, add the pakoras, and stir. Turn the heat down to a simmer. Cover and cook for 20 minutes to half hour, stirring occasionally to keep it from sticking to the bottom. Traditionally, the kardhi would bubble away on the very low heat of an angeethi for hours, thickening gradually. But it is not an implement that could survive the fast pace of city life. In the villages they might still use it on occasion.
 Transfer the kadhi to the serving bowl. For the final flourish, just before serving, heat a teaspoon of ghee. To it add cumin and red chilli powder, and pour it over the kadhi.
Serve hot with rice. It is good on its own too. I usually polish off a katori or two before it makes it to the table. (Seeee!!!! she did too :P )


Tuesday, August 2, 2011

Homemade Hand-cut Whole Wheat Spinach Fettuccine with Cherry Tomatoes


The downside of technological advances and the comfort that they provide us is that we have started to take it for granted and do not appreciate or take the effort to actually know how it was all done back in the day. And believe me, in the age of frozen foods and vegetables, ready to eat foods, store bought bread and all the varieties of pizza crusts, pie crusts and pastas to choose from, one would only be amazed, amused, and at least at a loss of words at how much different they taste from the stuff that is made right at home, right from the scratch. No wonder whenever I watched MasterChef and other shows before, the contestants were always encouraged to make everything from the scratch. At least they had the liberty to use equipments like pasta rollers and KitchenAid for their cooking ventures, but right now I have none of those. But I feel very proud to have made my first ever hand cut pasta at home, without any equipment! Pretty Awesome innit?!

Homemade Spinach Pasta (Whole Wheat) with Cherry Tomatoes
Adapted from Nick @ Macheesmo
Serves 3-4

Ingredients:

2 cups Whole Wheat Flour
2 Eggs
A pinch of Salt
2 tablespoons Oil
4 Tablespoons Water
1 cup chopped Spinach

For the Sauce

1 cup Cherry Tomatoes
Oil
Chili Flakes
Mixed dried Italian Herbs
Salt
Cheese for garnish.


Method

Prep The Spinach. I actually decided to try this recipe coz I have Spinach juice amongst others on a daily basis and I would always throw away the residual Spinach after the juice was squeezed out, with a heavy heart. What I did was that I just took out the juice of 1 cup Spinach in my juicer and then used the residue for this recipe, chopped it up real fine and threw away the unnecessary bits. What you guys could do is just finely chop the spinach or even a small whiz in the grinder would do well. But remember to keep this chopped spinach on a kitchen towel or paper napkin so the moisture gets absorbed.

Making the Dough: This is the absolute fun part if you ask me. But let me warn you that it needs a lot of elbow grease! On the other hand it is an excellent stress buster too, haha!! Let out all that frustration in the dough. Picture the person whom you hate the most while kneading the dough and it would turn our pretty darn awesome :P Well, back to the point. You need to sift your flour and salt on to a kneading bowl. Now, make a well in this very carefully.

Gently beat your Eggs together in a bowl. You could also mix your spinach and Oil in at this point, but I forgot to do that so I had to add them later.

Now pour everything into the well gently. Try not to spill it.

Now you need to beat this gently, incorporating the flour into it, a little at a time, and then you can stop using the fork and get your hands in and start kneading. Remember, you need to add water as needed, 1 tablespoon at a time. Whole Wheat Flour absorbs more water than normal All Purpose, so you might need a tablespoon or two extra. Do not fret :) Just use your judgment and keep kneading till it finally starts getting together.
 
At one point it might seem like its all going downhill, like a dry giant mess which would never come together,  but trust me and trust yourself, just keep kneading and it will come together. Mine took about 20 mins of kneading to get 3 balls of dough, I could not make one! The right consistency of the dough is when you pinch it between your thumb and index finger, the dough should stick to each other but not to your fingers, without falling apart. Like mighty putty :P

Now put these lovelies in a covered container and let them rest for 30 minutes in the refrigerator so the dough relaxes. Thereafter remove it and let it rest an additional 15 minutes so that the dough comes to room temperature. Now it's time to roll!
You need to roll this dough into long sheets so that makes it easier to cut your pasta. Use flour to dust the surface as and when you need it. This dough is pretty elastic! Then you can cut it into any pasta shape you like. I rolled my sheet and cut it into fettuccine! Super fun.


Once I cut them, I unrolled and let them hang and dry for 15 minutes before I started cooking them.


Cooking the pasta : This pasta cooks much quicker than the pasta from the packet. Mine took 6 minutes only. Boil lots of water with some salt in a deep pan, and till then you can work on gathering these beautiful strands of pasta and get ready for the big show :)


And once they're cooked they will look so beautiful, shiny and you can totally taste the difference while you're checking if they have been cooked. Reserve some pasta water, around 1/2 cup, and drain the rest of the water.


In another pan, heat up 2 tablespoons of Oil and when it gets hot, add in the red pepper flakes, herbs, salt and Cherry Tomatoes. I added them whole, but I really recommend that you slice them into halves and use the tomato-ey juices coz they give the pasta a better flavor! Mix it all up well, and garnish with cheese. This recipe does not need cheese coz it is good by itself, but come on, what is Pasta without a little cheese! :D


Newer Posts Older Posts Home

LinkWithin